



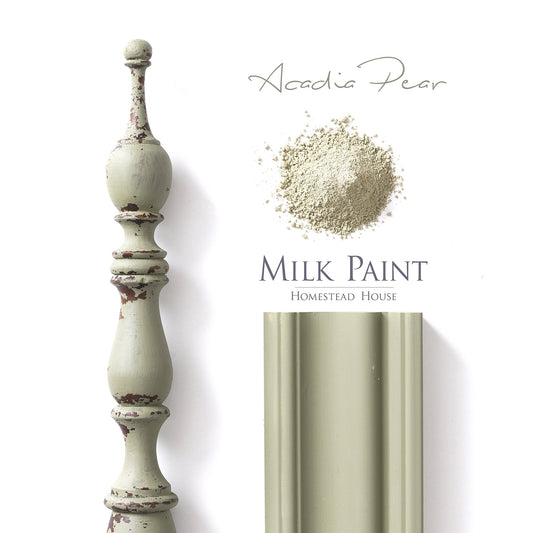
Acadia Pear
ONE PRODUCT. THREE DISTINCT LOOKS.
-

SMOOTH AS SILK
Milk Paint can create an incredibly smooth, refined finish with virtually no visible brush strokes. Its thin, self-leveling nature allows it to settle beautifully into the surface, leaving a soft, velvety look that feels as good as it looks.
-

AUTHENTICALLY DISTRESSED
Milk Paint creates naturally aged, time-worn character that feels truly authentic. Layer colours, distress edges and details, and reveal beautiful depth underneath for a finish that looks like it has evolved over time.
-

NATURALLY CHIPPY & CRACKLED
Milk Paint is famous for its authentic chippy, crackled finish—creating the character of beautifully aged paint without looking manufactured. Go from subtle flakes to bold cracks and layered colour, revealing the finish beneath for a truly time-worn, one-of-a-kind look.


Keeping the tradition alive. One beautiful project at a time.

Milk Paint FAQ's
How to Mix Milk Paint
Just add water – it’s truly that easy! Stir 1-part water to 1-part powder and you’re good to go. It may seem intimidating to use milk paint because of the mixing aspect – but don’t be discouraged. Rather, think of it as a chance to really get involved in the process. We’ve refined our recipe over the years making it easier than ever to work with. The best part is, our Milk Paint formula is shelf stable, so you only need to mix what you need. The rest will be ready for your next project.
How to prep different surfaces for Milk Paint
Bare Wood
Clean, dry and ready to paint.
Dull or Porous Finishes
Clean well and apply Milk Paint directly.
Previously Painted Surfaces
Clean thoroughly and lightly sand if needed.
Shiny or Glossy Surfaces
Use Bonding Agent for more controlled adhesion.
Previously Waxed Surfaces
Remove wax before painting unless you’re intentionally creating a chippy finish.
Laminate, Melamine & Other Non-Porous Surfaces
Use Bonding Agent, or apply a coat of Fusion Mineral Paint first before adding Milk Paint.
Want a Chippy Finish?
Skip the Bonding Agent and let Milk Paint naturally react with the surface.
What kind of surfaces can I use Milk Paint on?
Although Milk Paint is traditionally known as a furniture paint, it’s actually an incredible paint for all kinds of surfaces from floors to walls - especially to get that beautiful Limewash Look. If applying to a surface that's been previously painted with Fusion Mineral Paint you can apply the Milk Paint right over top with no bonding agent. Other non porous surfaces may need teh bonding agent for adhesion.
Is the finish sheer or opaque?
Solid Or stain coverage – you choose! Mixing instructions for a solid, opaque coverage are 1 part Milk Paint powder to 1 part water. If you want more of a stain look, mix 1 part Milk Paint powder to 3 parts water. Adjust as desired. Too opaque looking? Add more water. Too transparent? Add more powder.
What kind of finish can I expect?
One of our favourite things about our Milk Paint is how many different looks you can get. This is versatility at its finest. Depending on how you apply and finish it, you can get that super smooth MCM sleek finish, or a weathered and distressed look. Milk Paint is just like choosing your own adventure.
Depending on the look that you’re going for, you’ll mix it a bit differently, you’ll prep a little differently, you’ll apply it how you prefer, distress if you wish, or don’t, and you’ll topcoat it to your desire. It’s completely customizable.
Do I need a primer?
When applied to porous surfaces or dull finishes, no primer is needed. On raw wood, Milk Paint actually binds with the wood fibers, not allowing for that peeling to occur. Milk paint can absorb into porous surfaces without any additional product being used for instance brick, mortar, plaster etc. Chipping happens when it’s applied to an existing glossy sheen paint or a surface that has been oiled or waxed. Since it cannot absorb or adhere very well to these surfaces, the milk paint will chip randomly, which is also a beautiful effect.
Fusion Mineral Paint is a low matte sheen so milk paint can be applied to that. We encourage you to always test your methods prior to doing a project.
How long does it take to dry?
Our Milk Paint cures in 30 minutes. No, that’s not a typo! This is the fastest drying paint you’ll find on the market. In fact, it takes less time than it takes to stream an episode of your favourite show. Your time is precious, so go ahead and get your top coat ready. Within minutes you see the colour of the milk paint start to change – it almost goes chalky, and less intense of a colour.
You may stop and think, “this isn’t the colour I was going for!” – but wait until you top coat it to see it in all its glory and at its true vibrancy.
Do I need to Top Coat?
Milk Paint truly comes to life and becomes proteted against water spots when adding a top coat. Our preference is Natural Oil Based top coats like Hemp oil, because it’s the easiest to use. It will give you the most amazing finish and really make your Milk Paint pop.
New to Hemp Oil? This gorgeous, locally sourced oil is pressed from hemp seeds. It’s such a pleasure working with this naturally drying oil as there are no additives or solvents. It works beautifully on raw, new, or reclaimed wood. The older the wood the richer the colour of the wood becomes so you skip the need for a stain! Most beautiful of all, it smells like crushed walnuts when you work with it.
Do I have to mix the whole bag?
Waste not, want not – only mix what you need. It virtually lasts forever in powder form, it doesn’t go bad, whereas all premixed paints have a shelf life. This is indefinite as long as it is unmixed and kept in relative neutral temperatures and the container is completely shut so humidity cannot enter the packages. If you do happen to mix up too much Milk Paint, not to worry – simply put it into a tightly sealed container and when you are ready to use it again, simply stir it up. No need to refrigerate.
Our convenient sizes of Quarts and testers allow for essentially any size project to be completed without waste.
How to get the Crackle Finish with Milk Paint
Authentic Crackle without any added products needed, just mix your Milk Paint slightly thicker and use a hairdryer to quickly dry it. Cracks will appear during the drying process. The higher the heat setting, the larger the cracks!
TIP: Paint a base coat of Fusion Mineral Paint first in the colour you want to see showing through the cracks.
Tip: To really show off the details, add a tinted wax to highlight the cracks and the details. Liming wax will lighten and brighten, whereas an ageing or espresso wax will richen and darken it up! Either way, you’ll accentuate those beautiful cracks!
How to get the Chippy Look with Milk Paint
Trust us: You CAN control the chippy! On a surface that has a sheen to it, the chipping will simply occur naturally. On a low sheen surface, you can force the chippy by first applying a resist like our Beeswax Finish or Furniture Wax onto the surface, then the Milk Paint you apply over it will chip off.
You will need to apply more wax to a bare wood or porous surface, than a previously finished/shiny surface. Test this first to see how much wax you need; too much and all the paint will flake off! Not to worry, you can always try again!
Apply the wax strategically in areas that you are looking to see the chipping or flaking paint effect appear.
TIP: Want an aged look? Add one of our tinted Furniture Waxes or our Stain & Finishing Oil for an aged effect.
TIP: Do not add any Bonding Agent if you want the Chippy Chic look.
How to get the Distressed Look with Milk Paint
Milk Paint is perfect for achieving authentic, natural-looking distressing. Layer colour over colour of Milk Paint, or simply apply over a water-based stain finish, or a coat of Chocolate Fusion Mineral Paint™ which will look like a dark wood stain when sanding through.
220 sanding grit is recommended. When pressed along the edges and any detailing, you will reveal the details!
Try using our Beeswax Distressing Block between the layers of paint. This will ensure it’s easy to distress to reveal each colour.
TIP: Add our hemp oil when distressing so you can see the true pops of colour coming through from below as you are sanding, and to eliminate any dust while sanding! Wipe away the excess residue with a cloth that has hemp oil on it after sanding to reveal the beauty!
How to get a smooth look with Milk Paint
Make brush strokes ancient history
Clean your piece and remove any dust, wax or flaking paint. Give your piece a light sand to smooth and even out your surface prior to painting.
If you have a shiny, glossy finish, use the Bonding Agent to ensure even adhesion.
If the surface is flat and porous, new bare wood or a dull, old finish, simply apply the paint straight onto it. Apply as many coats as desired and when satisfied with your coverage, apply your desired top coat. Prior to applying your top coat, use a 400 grit to lightly sand your finish for a super smooth as silk feel!
